Slow Cooked Beef Cheeks

By Maya Hart
⬇️ Jump to Recipe
🥄 Prep: 15 mins 🔥 Cook: 210 mins ⏱️ Total: 225 mins 🍽️ Yield: 6 servings ⚡ 586 cal

My Confession About Fancy Meat

I have a confession to make. Before I had kids, I thought beef cheeks were some ultra fancy ingredient reserved for restaurants with valet parking. The idea of cooking them in my tiny apartment kitchen felt completely out of reach. But then I realized something crucial. Beef cheeks are actually an incredibly affordable cut of meat that just needs a little time to turn into something magical.

The Secret Weapon is in the Blending

Let us look at the real trick in this recipe. It is not the three hours in the oven or the eight hours in the slow cooker. The real magic happens at the very end. Most braised recipes just leave the mushy carrots and onions floating in the gravy. We are taking a stick blender to that cooking liquid and whizzing it until it is completely smooth. It transforms the sauce from a rustic stew into a glossy, creamy masterpiece. It is a brilliant little hack that makes you look like a culinary genius without any extra effort.

A Quick Reality Check on the Macros

Now we need to look at the nutrition label together. This bowl is an absolute powerhouse for keeping you full. You are getting a massive 49 grams of protein and 33 grams of fat, with barely 6 grams of carbohydrates. If you are managing blood sugar issues or just trying to avoid the afternoon crash, this is your dream dinner. The fat and protein will keep your energy as steady as a rock.

But we have to talk about the elephant in the room. The sodium. At nearly 2200 milligrams per serving, this is a very salty dish. If you are watching your blood pressure or dealing with late pregnancy swelling, you need to be strategic. Use a no salt added beef stock, skip the extra salt until the very end, and let the natural flavors shine.

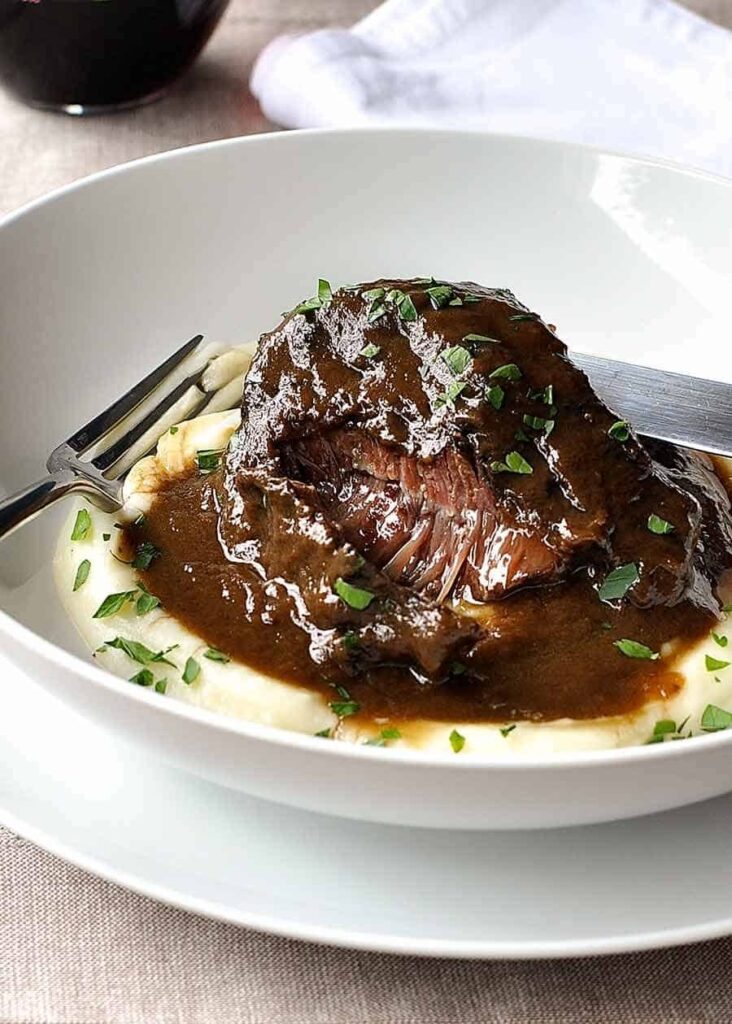
Serve this over the creamiest mashed potatoes you can muster, or if you are keeping things light, a silky cauliflower puree works beautifully. Pour a glass of whatever wine you have left over from the cooking, sit down, and let the tender meat melt in your mouth. You just made something incredibly special without leaving your house.
Slow Cooked Beef Cheeks

🩺 Reviewed on July 9, 2026 by: Katie Salmon, RD
🥄 Prep: 15 mins 🔥 Cook: 210 mins ⏱️ Total: 225 mins 🍽️ Yield: 6 servings ⚡ 586 cal

🥫 Ingredients

3 tablespoons olive oil, divided
1.5 kg (3 lb) beef cheeks (4 large or 6 small)
1 onion (white, brown, or yellow), roughly chopped (about 1 cup)
1 celery stalk, roughly chopped (about 1 cup)
1 carrot, roughly chopped (about ¾ cup)
4 garlic cloves, minced
6 sprigs fresh thyme (or 1½ teaspoons dried thyme leaves)
4 dried bay leaves (or 3 fresh)
1 cup (250 ml) beef stock
2 cups (500 ml) full-bodied red wine (Cabernet Sauvignon or Merlot)
2–3 teaspoons salt, divided
Freshly ground black pepper

📝 Instructions

  1. Trim and season. Use a sharp knife to remove any thick silverskin or large pieces of external fat from the beef cheeks. Pat them completely dry with kitchen paper, then rub all over with 1 teaspoon of the salt and a good grinding of black pepper.
  2. Brown the meat. Place a large, heavy-based casserole or Dutch oven over high heat and add 2 tablespoons of the olive oil. When the oil is shimmering, sear half the beef cheeks until a deep brown crust forms on all sides. Transfer them to a plate and repeat with the remaining cheeks, taking care not to crowd the pot.
  3. Build the aromatic base. Lower the heat to medium-high and pour in the remaining 1 tablespoon of oil. Toss in the onion and garlic and cook, stirring often, for about 3 minutes until the onion turns translucent. Add the celery and carrot and continue to cook for a further 3 minutes, allowing the vegetables to soften slightly.
  4. Deglaze and braise (oven method, as per cook time). Pour the red wine into the pot and bring it to a lively simmer while scraping the bottom with a wooden spoon to lift all the caramelised bits. Let it bubble for 1 minute, then add the beef stock, thyme, bay leaves, and a pinch of salt and pepper. Return the beef cheeks and any resting juices to the pot.
  5. Oven, Cover with a tight-fitting lid and transfer to a preheated 160°C (320°F) oven. Braise for 3 to 3½ hours, or until the cheeks yield easily when pierced with a fork.
  6. Stovetop, Alternatively, simmer gently on the hob over medium-low heat for 2 to 2½ hours, turning the cheeks once halfway.
  7. Slow cooker, Place the vegetables in the slow cooker, top with the seared beef, then pour in the wine, stock, and herbs. Cook on Low for 8–10 hours (or High for 6–8 hours) for medium cheeks, adjusting time for larger ones.
  8. Pressure cooker, Cook on high pressure for about 1 hour for small cheeks (around 250 g each).
  9. Blend the sauce. Once the beef is fall-apart tender, lift the cheeks out of the cooking liquid and set them aside. Discard the thyme stems and bay leaves. Using a hand-held stick blender, whizz the braising liquid and vegetables together until completely smooth, the colour will shift from dark brown to a lighter, creamy brown.
  10. Reduce and season. Pour the puréed sauce into a saucepan. Bring it to a steady simmer over medium-high heat and let it reduce by roughly one-quarter to one-third, stirring occasionally, until it reaches a thick gravy consistency. This will take around 5–10 minutes, and the sauce will darken again. Taste and adjust with additional salt and pepper as needed.
  11. Finish and serve. Slip the beef cheeks back into the warm sauce, cover, and keep gentle heat until ready to serve. Plate the cheeks on a bed of the creamiest mashed potatoes (or a cauliflower purée), ladle the glossy sauce generously over the top, and scatter with chopped parsley if you like.

🔬 Nutrition Facts

Serving Size: 389 g | Calories: 586 kcal | Carbohydrate Content: 6 g | Protein Content: 49 g | Fat Content: 33 g | Saturated Fat Content: 12 g | Cholesterol Content: 148 mg | Sodium Content: 2195 mg | Sugar Content: 2 g
Medical Disclaimer: This content is for informational purposes only and does not replace professional medical advice, diagnosis, or treatment. Always consult your OB-GYN, midwife, or a registered dietitian for personalized guidance tailored to your health history. I am a mom who figured this out the hard way, not your doctor!🔬 Researched using established prenatal nutrition guidelines

About the author – Maya Hart

I’m a mom of two and the founder of HomeBumpMeals. After a surprise gestational diabetes diagnosis, I turned my tiny kitchen into a test lab for easy, nourishing meals. Every recipe is researched using established prenatal nutrition guidelines (like ACOG & ADA) and battle-tested in the chaos of real life.

📚 Researched via ACOG & ADA Guidelines 🤰 Tested by a Real Mom 📸 What You See Is What I Made
Read Maya’s full story →

💬 Share your thoughts

Your email address will not be published. Required fields are marked *