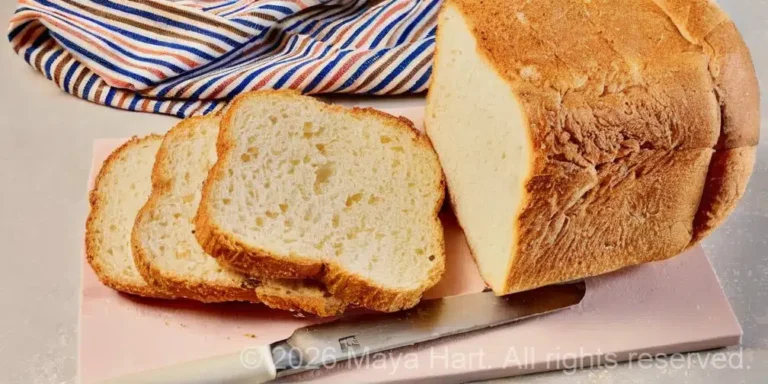
There are moments in pregnancy when all you want is a plain cracker. Not a gourmet multigrain crisp, not a flaxseed flatbread, just a simple, salty, shatteringly crisp cracker that tastes like childhood and settles a queasy stomach. I found myself in one of those moments during my first trimester with my second baby. I was deep in the phase where everything smelled too strong and my stomach rejected anything complicated. I had made a pot of gentle chicken soup, something I could just about tolerate, and then I realized we were out of crackers. Completely out. The nearest store was a twenty-minute drive, and the thought of getting in the car made me want to lie down on the kitchen floor.
My husband, half joking, suggested I make some. Normally I would have rolled my eyes, but I really wanted crackers. I searched my phone, found a shockingly short ingredient list, and stood in front of my pantry with a glimmer of hope. Flour, butter, water, salt. That was it. I had all four. Thirty minutes later I was pulling a sheet of golden, crispy, homemade saltine crackers from the oven, and they were better than anything from a box. Thinner, flakier, and with a fresh buttery taste that the grocery store version never quite delivers. I ate half of them standing at the counter, dipping them into my soup, and I felt a wave of relief. I had made crackers. In my kitchen. While feeling terrible. It felt like a superpower.
Now I make these crackers for soup nights, for snack platters, and for the early weeks of pregnancy when only bland, crunchy things will do. They are ridiculously easy, require no yeast or rising time, and use ingredients you already have. I have tucked a little bag of them into meal train deliveries alongside soup and lactation cookies, and new moms always seem surprised that homemade crackers are even a thing. They are, and once you make them once, you will never look at a store-bought sleeve the same way.
Why These Crackers Work So Well During Pregnancy
The first trimester is a survival game. For many women, it is the time when only beige, starchy foods feel safe. Crackers are a classic recommendation for morning sickness because they are bland, easy to digest, and provide quick energy without overwhelming the senses. But store-bought crackers often contain preservatives, hydrogenated oils, and a surprising amount of sodium. Making your own gives you complete control over the ingredients, which matters when you are trying to be mindful about what goes into your body.
These homemade saltines use just four simple ingredients: all-purpose flour, unsalted butter, water, and salt. The butter adds richness and helps the crackers bake up crisp. You can control the amount of salt you sprinkle on top. They have no artificial flavors, no corn syrup, no additives. Just a clean, crispy cracker that tastes pure and gentle. The dietitian who consults on HomeBumpMeals gave the thumbs up to simple homemade crackers like these, noting that the small amount of fat from butter can help settle the stomach and that the crackers provide easy-to-digest carbohydrates during a time when many women struggle to eat anything else.
The Shortest Ingredient List You Will Ever See
I love recipes that make me feel resourceful, and this one tops the list. You need nothing exotic, nothing you have to hunt for. Just a cup of flour, a couple tablespoons of melted butter, about seven tablespoons of water, and a pinch of salt. That is the dough. For the tops, you will want a little extra melted butter and a sprinkle of salt, maybe some flaky sea salt if you have it. That is all. You probably have these things within arm’s reach right now.
The dough comes together in a bowl, first with a spoon and then with your hands. It is a soft, pliable dough that rolls out beautifully. The key is to roll it as thin as you possibly can, about an eighth of an inch or even thinner. The thinner the dough, the crispier the cracker. I use a floured rolling pin on a floured surface, and I take my time getting it even. If the dough tears, just patch it back together. These are rustic crackers, not factory-perfect squares, and their uneven edges are part of their charm.
Rolling, Cutting, and Baking: A Quiet Kitchen Ritual
Preheat the oven to 400°F and line a baking sheet with parchment paper. While the oven warms up, mix the flour and salt in a medium bowl. Pour in the melted butter and water, and stir with a wooden spoon until a shaggy dough forms. Dump the dough onto a floured countertop and gently knead it a few times until it comes together into a smooth ball. No need to overwork it; you are not developing gluten for bread, just bringing everything together.
Roll out the dough into a large, thin rectangle. I aim for something roughly the size of my baking sheet, because I will cut it into smaller pieces later. Thinner dough means crispier crackers, so I roll until I can almost see the counter through it. If the dough starts to spring back, let it rest for a minute and then try again.
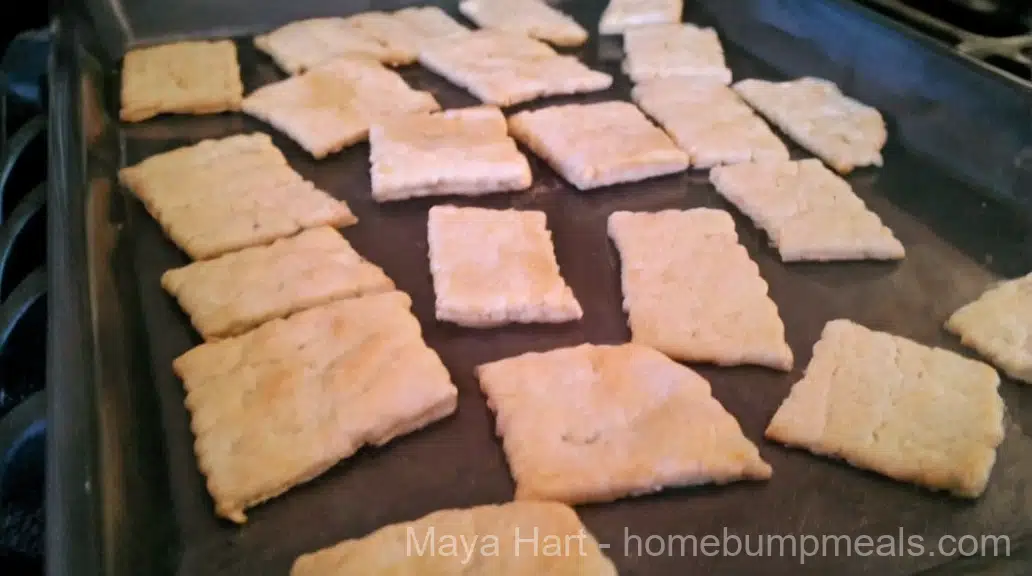
Now, cutting. I use a pizza cutter or a fluted pastry wheel for this, but a sharp knife works perfectly. I cut the dough into squares or rectangles, about an inch and a half across, no need to be precise. Prick each cracker a few times with a fork. This prevents them from puffing up into little pillows, which is a fun experiment but not a cracker. Transfer the pieces to the prepared baking sheet, leaving a bit of space between them. They will not spread much, but a little air circulation helps them crisp evenly.
Before they go into the oven, brush the tops lightly with melted butter and sprinkle with salt. I love using a flaky sea salt for this, but kosher salt is also great. Slide the baking sheet onto the center rack and bake for about fifteen minutes, until the crackers are golden and crisp. The edges will brown slightly. If some crackers at the edges are browning faster, I pull them out early and let the rest continue. Keep an eye on them in the last few minutes because they can go from golden to burnt quickly.
Cool the crackers completely on the baking sheet or a wire rack. They will crisp up even more as they cool. Then eat them immediately, or store them in an airtight container. They stay crispy for days, though in my house they rarely last that long.
Little Ways to Make Them Your Own
The beauty of a four-ingredient recipe is that it is a blank canvas. Once you have the basic cracker down, you can dress it up however you like. I have added a pinch of garlic powder and dried herbs to the dough for an Italian-inspired version that was wonderful with a bowl of minestrone. A little black pepper and a sprinkle of finely grated Parmesan before baking gives a cheesy, sharp cracker that pairs beautifully with a cold glass of milk. For a slightly nuttier cracker, swap out a few tablespoons of all-purpose flour for whole wheat flour, though the texture will be a bit denser.
During my first trimester, I kept the seasonings minimal. Just butter and salt. The plainest, simplest cracker I could make, and it was exactly what I wanted. Later in pregnancy, when my appetite returned, I started experimenting with everything bagel seasoning, sesame seeds, or a sprinkle of smoked paprika. My toddler now asks for “sprinkle crackers” and helps me press the toppings into the dough. It is a messy, floury, delightful activity that ends with warm crackers and a proud preschooler.
Storing and Gifting
These crackers keep well in an airtight container at room temperature for up to a week. Make sure they are completely cool before you seal them up, or the trapped steam will soften them. If they lose their snap after a few days, you can re-crisp them in a 300°F oven for five minutes.
If you are bringing a meal to a new mom, a little bag of homemade crackers tied with a ribbon is a thoughtful addition. Pair them with a jar of soup, like my Bone Broth Chicken Noodle Soup, or a container of Easy Homemade Hummus. Crackers feel like an extra step, a detail that says “I thought about you.” I have tucked them into meal train deliveries half a dozen times, and they always surprise and delight the recipient. One friend texted me later to ask if I had bought them from a bakery. I sent her the recipe and told her it was four ingredients. She did not believe me until she made them herself.
A Crack Is Part of the Survival Kit
I keep the ingredients for these crackers in my pantry at all times now, the same way I keep chicken stock and canned tomatoes on hand. They are my emergency backup when the store-bought sleeve runs out, my go-to when I need a quick snack for my kids, and my secret weapon for turning a bowl of soup into a meal that feels complete. During the nauseous weeks, I would carry a little bag of them in my purse, eating them one by one whenever my stomach started to turn. They were dry, salty, and utterly reassuring. They tasted like nothing and everything at the same time.
Making crackers from scratch may sound like an unnecessary project when you are pregnant and exhausted. I get it. But these take less time than a trip to the store, and the result is so much better than anything from a box. You control the ingredients. You control the salt. You get warm, fresh crackers straight from your oven, and you get the quiet satisfaction of having made something from nothing. In a season when so much is out of your control, that small act of creation can feel like a victory.
The full recipe card with exact measurements and step-by-step instructions is right below. Go check your pantry, and if you have flour, butter, water, and salt, you are ten minutes away from the best crackers you have ever eaten.