I used to buy hummus at the store without a second thought. The little plastic tub with the fancy label, the one that promised roasted garlic or red pepper, would go into my cart every week. I would peel back the lid at home, dip a carrot stick in, and feel vaguely virtuous about eating something with chickpeas in it. Then I got pregnant, and suddenly that store-bought hummus tasted flat to me. Flat and a little too salty, with a texture that reminded me of cold paste. My queasy stomach wanted something brighter, creamier, something that actually tasted like real lemon and sesame. So I decided to make my own. That batch of homemade hummus changed everything. My husband asked where I bought it. I held up the food processor.
What followed was a minor obsession. I made hummus every few days during my first pregnancy, then again through the second. I made it for the ravenous postpartum weeks when I needed protein that required zero cooking. I made it for the toddler years when my kids would only eat things they could dip. I have tweaked the ratios, tested the tricks, and landed on a method that turns a can of chickpeas into the creamiest, fluffiest, most lemony hummus you have ever tasted. The secret is so simple I almost could not believe it: whip the tahini and lemon juice first. That one extra step transforms hummus from a heavy, pasty dip into a cloud of savory silk. I am going to walk you through exactly why this works, why hummus is a nutritional gem during pregnancy, and how to make a batch that will ruin you for store-bought forever.
Why This Hummus Became a Pregnancy Staple for Me
When you are pregnant, snacks are not optional. They are survival. And the ideal pregnancy snack hits a few key notes: it has to be quick to assemble, gentle on a sensitive stomach, and substantial enough to carry you between meals. Hummus ticks every box. Chickpeas are rich in protein and fiber, which means they keep blood sugar steady and help with the digestive slowdown that so often comes with pregnancy. Tahini, made from ground sesame seeds, is a good source of calcium and healthy fats. Lemon juice adds a fresh brightness that can cut through nausea, and garlic brings flavor without heaviness. Paired with raw vegetables or whole grain crackers, hummus becomes a balanced mini-meal that you can eat with one hand while the other hand holds a baby or scrolls through your phone.
The dietitian who consults on HomeBumpMeals is a big fan of chickpeas during pregnancy. She often points out that they provide plant-based iron, and when you pair hummus with vitamin C from lemon juice, your body absorbs that iron more effectively. The olive oil adds anti-inflammatory monounsaturated fats, and the tahini brings a little extra protein and calcium. For anyone managing gestational diabetes, hummus is a smart choice because the fiber and protein blunt the blood sugar response. I relied on it heavily during my second pregnancy when I had to watch my numbers carefully. A few big spoonfuls of hummus with cucumber slices or bell pepper strips became my go-to afternoon snack, and my post-meal readings stayed steady.
The One Trick That Changes Everything
Most hummus recipes tell you to dump everything into the food processor and blend. That works. It makes hummus. But if you take one extra step before you add the chickpeas, your hummus will go from good to incredible. The trick is to whip the tahini and lemon juice together first. I pour a quarter cup of well-stirred tahini and a quarter cup of fresh lemon juice into the food processor, turn it on, and let it run for a full minute. Then I scrape down the sides and run it for another thirty seconds. What happens is a small kitchen miracle: the tahini and lemon juice transform from a thin, gritty liquid into a thick, pale, almost whipped paste. It looks like the beginning of a frosting. That whipped base is what gives the hummus its airy, creamy texture later. Once you see it happen, you will never skip this step again.
After the tahini and lemon are whipped, I add the olive oil, a small minced garlic clove, ground cumin, and salt. I process again until that mixture is smooth and fragrant. Then come the chickpeas, added in two batches. The first half gets processed for a full minute until it is quite smooth. The second half goes in and processes until the hummus is thick but uniform. At this point, it will still look a little dense. That is where the cold water comes in. With the processor running, I drizzle in two to three tablespoons of cold water, one tablespoon at a time, until the hummus fluffs up and turns pale and creamy. You can use aquafaba, the liquid from the chickpea can, instead of water; it whips even lighter and gives a texture that is almost mousse-like. I have done it both ways and both are wonderful.
Ingredients Worth Knowing About
This recipe uses only a few ingredients, so each one matters. Here is a closer look at what goes into the food processor and why.
- Chickpeas: Canned are perfectly fine; just drain and rinse them. If you have the time and energy, home-cooked chickpeas have a slightly sweeter, nuttier flavor. I use canned for convenience 90 percent of the time. One 15-ounce can yields the right amount. If you want an even silkier hummus, you can peel the chickpeas, but I rarely do. The difference is subtle, and life is short. The skins add fiber, which is a plus during pregnancy.
- Tahini: This is sesame seed paste and it is safe during pregnancy. It gives hummus its characteristic nutty richness. I like to use a well-stirred, high-quality tahini that pours easily. If your tahini is old and separated, the hummus can taste bitter. Store it in the fridge after opening and stir it thoroughly before measuring.
- Fresh lemon juice: Bottled lemon juice cannot compete. Freshly squeezed lemon juice is bright and fragrant, and it wakes up the entire dish. The acid also helps cut through the richness of the tahini and oil.
- Garlic: One small clove, minced, gives a gentle garlicky warmth without being overpowering. If you are sensitive to raw garlic during pregnancy, you can use half a clove or a pinch of garlic powder. Roasted garlic is another lovely, mellower option.
- Extra-virgin olive oil: A fruity, light olive oil works best. It adds creaminess and a glossy finish. I also drizzle a little extra on top just before serving.
- Ground cumin: A half teaspoon adds a warm, earthy note that deepens the flavor without making the hummus taste like a spice blend. It is a classic addition for a reason.
- Salt: Do not skip it. Hummus without enough salt tastes flat. I start with a half teaspoon and adjust at the end.
- Cold water or aquafaba: This is the final secret to a fluffy texture. A few tablespoons of cold liquid, added while the processor is running, transform thick hummus into something light and creamy.
The Simple Steps in Order
I have made this hummus so many times I could do it in my sleep, and the rhythm of it is almost soothing. Here is the flow that works every time.
- Whip the tahini and lemon juice. Pour both into the food processor and process for one full minute. Scrape the sides, then process thirty seconds more. It should be thick and pale.
- Add the olive oil, garlic, cumin, and salt. Process for thirty seconds, scrape, and process another thirty seconds until well blended and smooth.
- Add the chickpeas in two batches. Drain and rinse the chickpeas. Add half to the processor and run for one minute. Scrape the sides. Add the remaining chickpeas and process for one to two minutes until thick and relatively smooth.
- Thin with cold water. With the processor running, slowly drizzle in two to three tablespoons of cold water or aquafaba. The hummus will lighten in color and become fluffy and creamy.
- Taste and adjust. Add a pinch more salt, a squeeze of lemon, or a little more cumin until the flavor is just right.
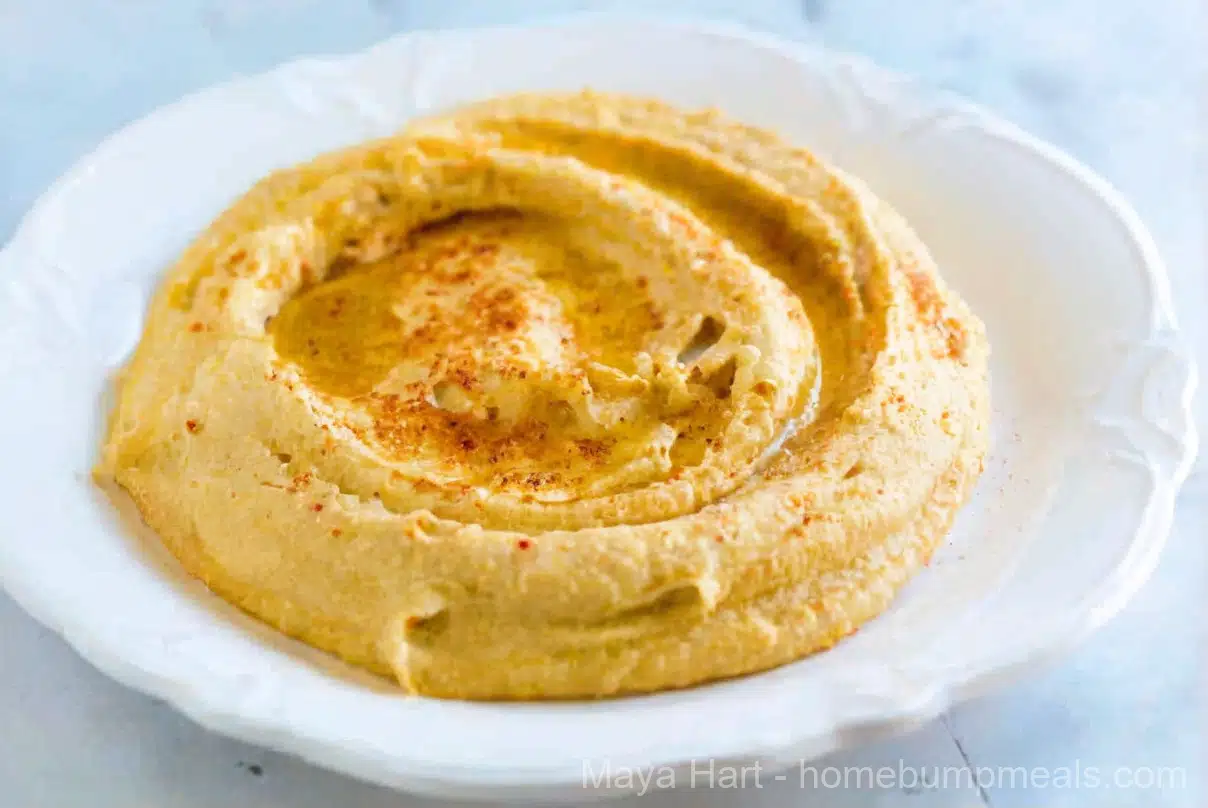
- Serve with a flourish. Scoop the hummus into a bowl, smooth the top with the back of a spoon, and drizzle with olive oil. A sprinkle of paprika, sumac, or za’atar on top makes it look as good as it tastes.
Little Adjustments I Have Made Over the Years
This recipe is a canvas, and I have painted it many different ways depending on what I was craving or what was in my pantry. A few favorites:
- Roasted garlic hummus: Roast a whole head of garlic until soft and golden, then squeeze the cloves into the food processor in place of the raw garlic. It is mellower and slightly sweet.
- Roasted red pepper hummus: Add a jarred roasted red pepper, drained and patted dry, along with the chickpeas. The color turns a beautiful orange-red and the flavor is smoky and sweet.
- Extra lemony: If I am feeling sluggish, I add a little more lemon juice and a bit of lemon zest. The brightness seems to cut through any lingering nausea.
- Herb-flecked hummus: A handful of fresh parsley, cilantro, or dill added at the end and pulsed a few times gives a green-flecked, garden-fresh version.
- Without tahini: If I am out of tahini, I use a little extra olive oil and a spoonful of natural unsweetened peanut butter or just omit it. The texture will be slightly less creamy, but the hummus is still delicious.
Storing and Freezing for Later
Homemade hummus keeps in an airtight container in the refrigerator for up to a week. I make a double batch on Sundays and eat it all week long. The flavor actually improves after a day as the garlic and cumin mellow. To freeze hummus, I transfer it to a freezer-safe container, smooth the top, and pour a thin layer of olive oil over the surface. It freezes well for up to a month. Thaw it in the fridge overnight and stir before serving.
During both postpartum periods, I kept a container of frozen hummus in the freezer at all times. It was one of the few things I could eat straight from the fridge with a bag of baby carrots or pita chips while nursing. A friend once dropped off a batch of this hummus along with a container of cut vegetables and a stack of warm pita bread, and I nearly cried. It was exactly what I needed. If you are looking for more meal train ideas that actually help new moms, I have a whole post dedicated to them: 25 Nourishing Postpartum Meal Train Ideas.
Why I Stopped Buying Hummus Entirely
The first time I served this hummus to guests, my father-in-law asked what brand it was. When I told him I made it, he did not believe me. That is the moment I knew this recipe was special. It tastes brighter, fresher, and somehow lighter than anything from a tub. The whipped tahini and lemon base makes it creamy in a way that store-bought hummus never achieves. And I love that I control the salt, the garlic, and the quality of the olive oil. During pregnancy, when I was so careful about everything I ate, having a condiment that I made from scratch with ingredients I trusted was a small but genuine comfort.
Now I make hummus almost every week. My kids dip crackers in it. I spread it on sandwiches instead of mayonnaise. I thin it with a little water and use it as a sauce for grain bowls. It is one of those recipes that feels like a secret weapon, so simple but so much better than anything you can buy. If you have a food processor and ten minutes, you can make hummus that will change the way you think about chickpeas.
The full recipe card with exact measurements and step-by-step instructions is right below. Make a batch, scoop it into a bowl, and know that you just did something delicious for yourself and your baby.