Summary: When I was 38 weeks pregnant, I stuffed a pan of these jumbo shells with creamy spinach ricotta filling, covered them in a rich tomato sauce, and froze the whole thing. A week later, with a newborn in one arm and a toddler demanding snacks, I pulled that pan from the freezer and baked it into the most comforting, saucy, satisfying dinner I could imagine. These spinach ricotta stuffed shells require zero pre-cooking of the pasta, use only pasteurized ricotta for safety, and are endlessly adaptable. They are the perfect meal to make ahead for busy weeknights, postpartum recovery, or dropping off to a friend who just had a baby.
I discovered the magic of stuffed shells during my first pregnancy, when my nesting instinct kicked in hard around month eight. I had this overwhelming urge to fill my freezer with food that would sustain us through the newborn weeks, something I could pull out and bake without a single thought. I tried lasagnas, casseroles, soups. But the dish that became my absolute favorite was a pan of jumbo pasta shells, stuffed with creamy spinach and ricotta, swimming in a garlicky tomato sauce, and buried under a blanket of melted mozzarella. The first time I ate one, standing up in my kitchen with a three-week-old baby asleep in the wrap, I felt like I had given myself a hug. It was hot, cheesy, deeply satisfying, and required nothing from me except the patience to let it bake.
Now, years later, I make these spinach ricotta stuffed shells on a regular rotation. They are the meal I prep on a Sunday when I know the week ahead is going to be chaotic. They are the dish I bring to friends navigating the blurry newborn haze. And they are the dinner my toddler actually eats without complaint because “cheesy pasta” is one of her love languages. This recipe has become a cornerstone of my home cooking, and I am so excited to share it with you, with all the tips I have learned through many, many batches.
Why These Stuffed Shells Are a HomeBumpMeals Hero
When I think about what makes a recipe work for pregnancy and postpartum, I look for a few things: it has to be deeply nourishing, relatively hands-off, and easy to adapt. These stuffed shells hit every single one of those marks, and they also happen to taste like something you would order at a cozy Italian restaurant. Here is why I love them so fiercely.
- Protein and iron in one dish: The combination of ricotta, mozzarella, Parmesan, and egg in the filling delivers a solid dose of protein, which helps keep blood sugar steady and supports your baby’s growth. The spinach adds iron, and because the tomato sauce is rich in vitamin C, your body can absorb that iron more effectively. My consulting dietitian pointed that out, and I have never forgotten it.
- Pasteurized ricotta is perfectly safe: I know that pregnancy brain can spin with questions like “can I eat ricotta cheese during pregnancy?” The answer is yes, as long as it is pasteurized. All commercial ricotta sold in regular grocery stores is pasteurized. Just check the label for the words “pasteurized milk” and you are good to go. I have a whole guide dedicated to cheese safety during pregnancy if you want a deeper dive: The Ultimate Guide to Eating Cheese During Pregnancy.
- No pre-cooking the shells: This is the single most brilliant part of this method. You stuff the jumbo shells completely raw, then submerge them in a watery tomato sauce. They cook right in the oven, absorbing all that garlicky, herby flavor as they become perfectly al dente. No more wrestling with hot, floppy, slippery shells that tear and make you want to cry. That alone makes this recipe a pregnancy win.
- Make-ahead and freezer-friendly: I assemble the entire dish, cover it tightly, and either refrigerate it for up to a day or freeze it for up to three months. When it is time to eat, it goes straight into the oven from the fridge or freezer. No thawing, no thinking. This is the kind of meal that makes you feel like you are taking care of your future self, and that is a powerful feeling when you are about to have a baby.
- One pan, many servings: A single baking dish serves five or six generous portions, which means leftovers for days, or a meal train delivery that will actually feed a family for more than one night.
The No-Boil Method: Why It Works So Beautifully
If you have ever made traditional stuffed shells, you know the pain: boiling the jumbo pasta until floppy, draining it without tearing half of them, then trying to stuff wet, slippery shells that collapse under the weight of the filling. It is a kitchen task that requires patience and a gentle touch, neither of which I possess when I am pregnant and hangry.
This recipe bypasses all of that. You use the jumbo shells completely raw and uncooked. The trick is the sauce: you start with a large volume of watery tomato sauce that the shells cook in, much like pasta cooks in a pot of boiling water. Over the 70 minutes of covered baking, the shells absorb the liquid, soften to a perfect al dente, and leave behind a thick, rich, intensely flavorful sauce. It feels like magic, but it is really just good food science. And it means you spend way less time at the stove and way more time with your feet up.
The Ingredients That Make This Dish Unforgettable
These stuffed shells are built on simple ingredients that work together beautifully. I have tested this recipe so many times, and I have learned exactly what makes the filling creamy and flavorful, and what makes the sauce taste like it simmered all day when it really only took 20 minutes.
The Spinach Ricotta Filling
- Ricotta: Full-fat ricotta is non-negotiable here. It is creamier, richer, and holds the filling together better than low-fat versions. I always check the label to confirm pasteurization, and then I use it without worry.
- Spinach: I use frozen chopped spinach for convenience. Thaw it completely, then grab handfuls and squeeze out as much water as you possibly can. Too much moisture will make the filling watery and the shells soggy. If you have an abundance of fresh spinach, you can wilt it down in a pan, squeeze out the liquid, and use it instead. You will need about a pound of fresh spinach to equal the frozen amount.
- Parmesan and shredded cheese: Parmesan adds salty, savory depth, and the shredded cheese (I use a sharp cheddar or a tasty cheese) gives the filling that melty, gooey texture. Do not skip the Parmesan; it does a lot of the seasoning work.
- Garlic, egg, nutmeg: Garlic makes everything better. The egg binds the filling so it does not crumble apart. A little grating of fresh nutmeg is optional but adds a lovely warmth that complements the spinach beautifully. I use it almost every time.
- Salt and pepper: Do not be shy. The filling needs adequate seasoning or it will taste flat.
The Tomato Sauce
The sauce is what makes this method work. It needs to be thin and plentiful at the start so the shells have enough liquid to cook in. As the dish bakes, that liquid reduces into a thick, smooth, intensely flavorful sauce. Here is what goes into it:
- Tomato passata: This is pureed, strained tomatoes with no added seasonings. It creates a smooth sauce that cooks the shells evenly. In the US, it is sometimes labeled “tomato puree” and you can use Hunt’s tomato sauce as a substitute. If all you have is crushed canned tomatoes, blend them until smooth before using.
- Shallots and garlic: Shallots are milder and sweeter than onions, and they almost disappear into the sauce, leaving behind a silky texture and subtle flavor. You can use a small onion if that is what you have.
- Tomato paste: This intensifies the tomato flavor and gives the sauce body. Cook it for a minute with the aromatics to remove the raw edge.
- Vegetable stock: A full liter. I know it sounds like a lot, but you need all that liquid for the shells to cook properly.
- Herbs and spices: A bay leaf, dried thyme, and dried oregano. These simmer with the sauce and infuse it with a gentle, earthy warmth.
- Sugar, salt, and pepper: A small pinch of sugar takes the sour edge off the tomato paste. Salt and pepper round everything out.
How to Make Spinach Ricotta Stuffed Shells
The process is wonderfully straightforward, and it has a nice rhythm: make the sauce, stuff the shells, assemble, and bake. Here is a step-by-step guide, filled with all the little tips I have gathered over dozens of batches.
Step 1: Make the Sauce
Heat olive oil in a pot over medium-high heat. Add the finely chopped shallots, garlic, bay leaf, thyme, and oregano, and cook until the shallots are translucent and fragrant. Add the tomato paste and stir it around for about a minute; this deepens the flavor and removes any raw sourness. Then add the passata, vegetable stock, sugar, salt, and pepper. Stir it all together and let it simmer gently, uncovered, for 20 minutes. The sauce will look thin and abundant. That is exactly what you want. Keep it hot while you prepare the rest.
Step 2: Make the Filling
Squeeze the thawed spinach until it is as dry as possible. I do this in handfuls over the sink, wringing it out like a sponge. Place the spinach in a mixing bowl with the ricotta, Parmesan, shredded cheese, egg, minced garlic, a grating of nutmeg (if using), salt, and pepper. Mix everything together until it is well combined and creamy.
Step 3: Stuff the Shells
Take the uncooked jumbo shells and, using a small spoon or an offset spatula, fill each one generously with the spinach ricotta mixture. Stuff them full. They will look slightly overstuffed, and that is perfect. The filling will settle and expand slightly as it bakes.
Step 4: Assemble the Dish
Pour the hot tomato sauce into a 9×13-inch baking dish. Gently nestle the stuffed shells into the sauce, one by one. Most of the shells should be mostly submerged in the liquid, though a few may poke up above the surface. That is okay; the steam in the covered dish will cook those parts, too.
Step 5: Bake, Covered, Then Cheese It
Cover the baking dish tightly. I use a large baking tray placed upside down on top, which is easier than foil and lets a tiny bit of steam escape. Bake at 400°F (200°C) for 70 minutes. When the timer goes off, check a shell. It should be tender and al dente. Sprinkle the shredded mozzarella and Parmesan over the top, then return the dish to the oven, uncovered, for another 15 minutes until the cheese is bubbly, melted, and golden in spots.
Step 6: Serve and Marvel
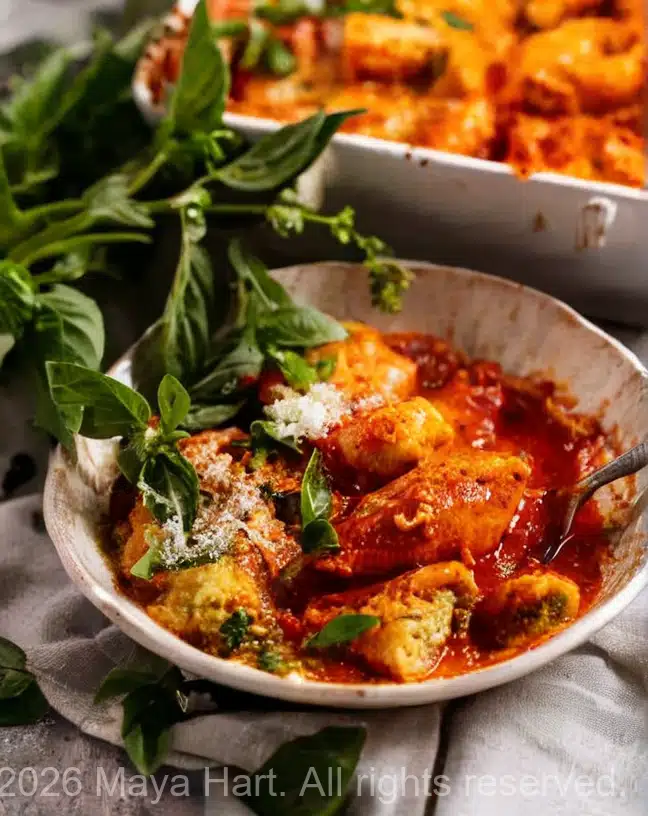
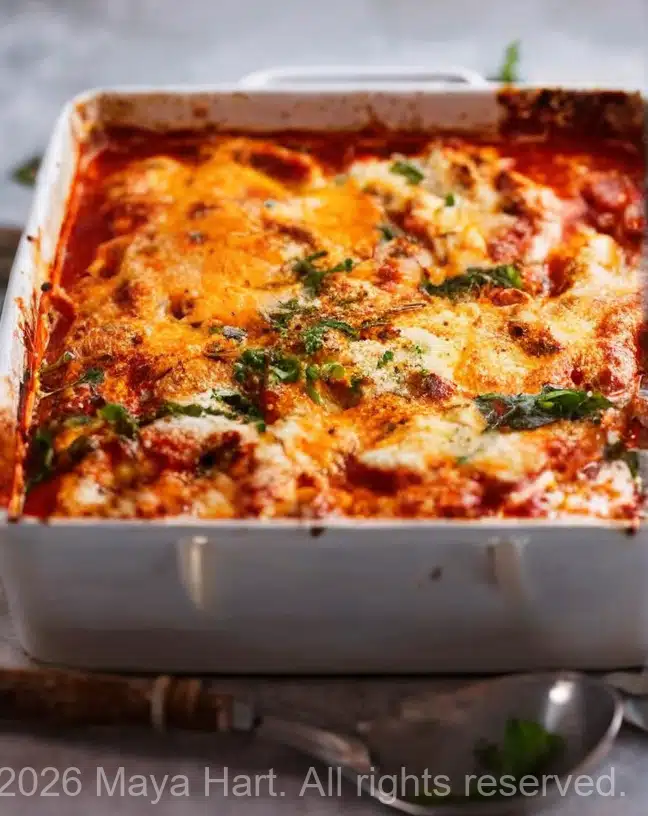
Scoop the shells onto plates, making sure to get plenty of that rich, now-thickened sauce. Garnish with fresh basil and an extra sprinkle of Parmesan if you are feeling fancy. Eat immediately and feel like you have just won at dinner.
Tips for the Best Stuffed Shells Every Time
- Do not skip the squeeze. The spinach must be as dry as you can get it. If it is too wet, the filling will be watery and the shells might not hold their shape.
- Use full-fat ricotta. Low-fat ricotta can be grainy and dry, and it does not yield the same creamy filling. If you can, buy a high-quality brand from the deli counter. I love Paesanella, but any creamy, full-fat ricotta will work.
- Keep the sauce hot. When you pour the sauce into the baking dish and add the shells, it should still be very warm. This helps the shells start cooking immediately and ensures even baking.
- Cover tightly. The shells need that trapped steam to cook properly. If you use foil, crimp it tightly around the edges. I prefer the baking tray method because it is easy and reusable.
- Check for doneness before adding cheese. After 70 minutes, poke a shell with a fork or a toothpick. It should be tender. If it still feels firm, cover the dish and return it to the oven for another 10 minutes before adding the cheese.
- Let it rest a few minutes. After baking, let the dish sit for five minutes before serving. The sauce will thicken slightly, and the shells will be easier to scoop.
Make-Ahead and Freezer Instructions
This recipe was practically designed for meal prep and freezer stashes. You can assemble the entire dish, sauce and all, up to 24 hours in advance and store it covered in the refrigerator. When you are ready to bake, you may need to add 10 minutes to the covered baking time because the dish will be starting from cold.
To freeze, assemble the dish completely, but do not add the mozzarella and Parmesan topping. Wrap the dish tightly in a double layer of plastic wrap, then a layer of foil. Freeze for up to three months. When you are ready to bake, remove the plastic wrap and foil, cover with a baking tray or fresh foil, and bake from frozen. It will take about 90 minutes covered, then add the cheese and bake for another 15 to 20 minutes until bubbly and golden. There is nothing like pulling a homemade pan of stuffed shells from the freezer on a day when you have zero energy to cook.
A Note on Ricotta Safety During Pregnancy
If you have ever wondered, “Can I eat ricotta cheese during pregnancy?” I am here to tell you that yes, you can, as long as it is pasteurized. All commercially produced ricotta in the United States and Australia is made from pasteurized milk. Just check the label for the word “pasteurized” and you are safe. The same rule applies to the Parmesan, mozzarella, and any other cheese you use in this dish. I have a detailed, printable guide on exactly which cheeses are pregnancy-safe and how to read labels here: The Complete Guide to Cheese During Pregnancy. I relied on ricotta heavily during both my pregnancies, especially in this exact recipe, and it was a creamy, calcium-rich comfort food that never let me down.
Variations to Make These Shells Your Own
- Meat lovers’ version: Brown some ground beef, turkey, or Italian sausage with the garlic and onions, then stir it into the sauce for a heartier dish.
- Extra vegetables: Add finely chopped sautéed mushrooms, zucchini, or bell pepper to the filling for added nutrients and texture.
- Vegan option: Use a tofu-based ricotta, a plant-based mozzarella and Parmesan, and skip the egg or use a flax egg. The sauce is already vegan as written if you use vegetable stock.
- Different cheeses: Swap the mozzarella topping for provolone, fontina, or a smoky scamorza. In the filling, goat cheese or a creamy feta works beautifully in place of some of the ricotta.
- Herb boost: Stir chopped fresh basil, parsley, or chives into the filling for a burst of freshness.
What to Serve with Stuffed Shells
These shells are a meal in themselves, but a simple side makes them feel even more complete. I love serving them with a crisp arugula salad dressed in lemon and olive oil, or a big Italian chopped salad if I have a few extra minutes. Garlic bread or a warm, crusty baguette is mandatory for mopping up any leftover sauce. If I am feeling ambitious, a simple tiramisu or fresh fruit for dessert turns it into a full dinner party menu, even if the only guests are my toddler and a sleeping baby.
Maya’s Mom Confession: The Freezer Pan That Saved My Sanity
I will never forget the day, about ten days after my second baby was born, when I pulled this pan of stuffed shells from the freezer. I had not slept more than three hours in a row. My milk was coming in, my body was sore, and I was hungrier than I had ever been in my life. My husband was wrangling our toddler, and I was alone in the kitchen for the first time all week. I put the frozen pan in the oven, set a timer, and sat on the couch with my baby. Ninety minutes later, the smell of garlic, tomato, and melting cheese filled the house, and I ate two giant shells straight from the dish, standing up, while the baby dozed. I am not exaggerating when I say I felt like a person again. That freezer meal was a gift from my past self to my present self, and it is a gift I now give to every pregnant friend I know.
If you are currently growing a baby, or in the thick of newborn life, or just need a dinner that does the work for you, I hope you make these stuffed shells. They are comfort, convenience, and nourishment all in one bubbly, cheesy pan.
Ready to make them? The full recipe card, with exact measurements, step-by-step instructions, and all my notes, is right below this post. Go preheat your oven and let us get stuffing.