My Go-To Canned Tuna and Rice Recipe

By Maya Hart
⬇️ Jump to Recipe
🥄 Prep: 10 mins 🔥 Cook: 20 mins ⏱️ Total: 40 mins 🍽️ Yield: 2 Servings ⚡ 583 cal

The Pantry Shelf Rescue

Let us talk about the pantry shelf of shame. You know the one. It is where the half empty jars of condiments live next to the cans of tuna you bought during a panic grocery run. When the fridge is completely bare and the baby is screaming, that shelf is your only hope.

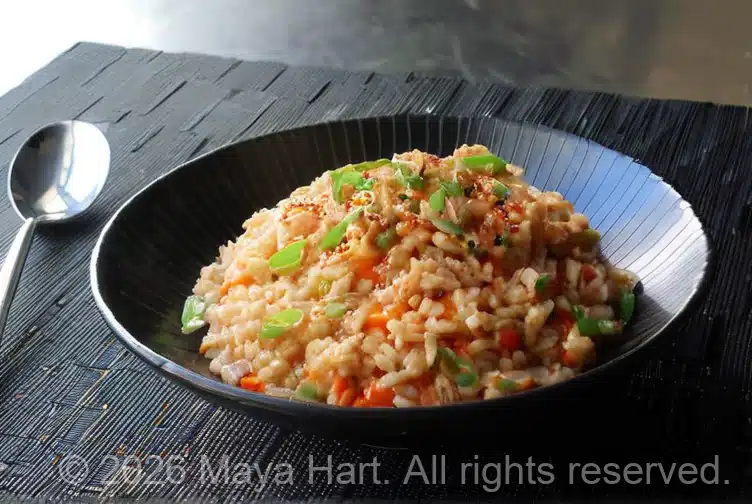
Most people think canned tuna means sad sandwiches or dry casseroles. We are doing better today. We are taking that humble can of tuna packed in olive oil and tossing it with an absolute flavor bomb. Red bell pepper, jalapeno, rice vinegar, soy sauce, sriracha, and sesame oil. It takes ten minutes to mix this up while the rice cooks. It tastes like something you would get from a fancy sushi truck, but it is just you standing in your kitchen in sweatpants.

The Macro Reality Check

Now we need to look at the nutrition label together. This bowl is a beast. You are getting a massive 38 grams of protein, which is incredible for keeping you full and supporting your milk supply if you are nursing. But we have to talk about the carbohydrates and the sodium.

At 83 grams of carbs, this is a very heavy bowl if you are eating it all at once. When I was managing my gestational diabetes, eating this entire thing by myself would have sent my blood sugar straight into the stratosphere. The trick here is portion control. This recipe makes two huge servings. If you are watching your glucose, eat half of it and save the rest for tomorrow. The protein and the fat from the olive oil tuna will help keep your blood sugar stable, but 83 grams is just too much for one sitting.

And the sodium. At nearly 1500 milligrams, the soy sauce and seasoned rice vinegar do a lot of heavy lifting. If you are dealing with third trimester swelling, just use low sodium soy sauce and go easy on the salt. Drink a massive glass of water and enjoy the flavor.

The Toddler Translation

The recipe calls for jalapeno, sriracha, and Korean red pepper flakes. My three year old currently believes that anything with a single spice is lava. So I just scoop his portion out before I add the hot sauce. He gets the mild tuna rice with the sweet red bell pepper, and I get to add my sriracha to my bowl. Everyone wins, and nobody is crying over spicy food.

The Ten Minute Rest

The instructions tell you to let the rice sit covered for ten minutes after it cooks. Do not skip this. It lets the steam finish cooking the grains so they are perfectly fluffy instead of gummy. Use those ten minutes to finally sit down, wipe your face, or just stare at the wall.

Fluff the rice, toss it with that glorious tuna mixture, and eat it warm or cold. It is just as good the next day. You just turned pantry dust into a gourmet dinner. Grab a fork and take a breath. You survived another day.
My Go-To Canned Tuna and Rice Recipe

🩺 Reviewed on July 9, 2026 by: Cassandra Stockwell, MS, RDN, LDN, IBCLC
🥄 Prep: 10 mins 🔥 Cook: 20 mins ⏱️ Total: 40 mins 🍽️ Yield: 2 Servings ⚡ 583 cal

🥫 Ingredients

1 cup uncooked long-grain rice
1 ½ cups water
1 (7 ounce) jar tuna packed in olive oil
½ cup finely diced red bell pepper
¼ cup finely diced jalapeno pepper
¼ cup finely sliced green onions
⅓ cup seasoned rice vinegar
½ lemon, juiced, or to taste
2 tablespoons soy sauce
2 teaspoons Sriracha hot sauce
½ teaspoon sesame oil
1 pinch Korean red pepper flakes (gochugaru), or to taste
1 teaspoon finely sliced green onion, or to taste

📝 Instructions

  1. Gather the ingredients.
  2. Pour rice into a heavy pot and add water; swirl to allow rice to settle.
  3. Bring to a simmer over medium-high heat; do not stir.
  4. Reduce heat to low, cover, and continue to simmer for 15 minutes.
  5. While rice is cooking, place tuna into a large mixing bowl and break up with your hands or a fork.
  6. Toss in red bell pepper, jalapeno, 1/4 cup green onions, rice vinegar, lemon juice, soy sauce, Sriracha, and sesame oil.
  7. Mix with a fork until thoroughly combined.
  8. Turn off heat and let rice sit, covered, for 10 minutes.
  9. Fluff rice with a fork to separate the grains and break up any large clumps; transfer into the mixing bowl.
  10. Mix thoroughly with a spoon until all the ingredients are evenly incorporated.
  11. Taste and adjust seasoning if needed.
  12. Serve warm, at room temperature, or cold like a rice salad, topped with red pepper flakes and 1 teaspoon green onion.

🔬 Nutrition Facts

Servings: Per 2 | Calories: 583 | Total Carbohydrate: 83g | Dietary Fiber: 4g | Total Sugars: 3g | Protein: 38g | Total Fat: 10g | Saturated Fat: 2g | Cholesterol: 18mg | Vitamin C: 80mg | Sodium: 1495mg | Calcium: 79mg | Iron: 7mg | Potassium: 544mg
Medical Disclaimer: This content is for informational purposes only and does not replace professional medical advice, diagnosis, or treatment. Always consult your OB-GYN, midwife, or a registered dietitian for personalized guidance tailored to your health history. I am a mom who figured this out the hard way, not your doctor!🔬 Researched using established prenatal nutrition guidelines

About the author – Maya Hart

I’m a mom of two and the founder of HomeBumpMeals. After a surprise gestational diabetes diagnosis, I turned my tiny kitchen into a test lab for easy, nourishing meals. Every recipe is researched using established prenatal nutrition guidelines (like ACOG & ADA) and battle-tested in the chaos of real life.

📚 Researched via ACOG & ADA Guidelines 🤰 Tested by a Real Mom 📸 What You See Is What I Made
Read Maya’s full story →

💬 Share your thoughts

Your email address will not be published. Required fields are marked *